yucatio@システムエンジニア

趣味で作ったものいろいろ

Material-UIのPaperを使用する(STEP 4 : Material-UIの導入 - React + Redux + Firebase チュートリアル)

★前回の記事

yucatio.hatenablog.com

Material-UIのPaperを使用し、コンテンツが紙の上に載っているようなUIにします。 最新の更新一覧とタスク一覧をPaperの上に載せます。

f:id:yucatio:20190428221857p:plain

最新の更新一覧でPaperを使う

最新の更新をPaperで囲みます。<div><Paper>に変更します。

src/components/dashboard/recentUpdatedTodos/index.js({/* xxx */}のコメントは実行前に削除してください)

import Paper from '@material-ui/core/Paper'  // 追加

let RecentUpdatedTodos = ({todos}) => {
  return (
    <Paper>  {/* 変更 */}
      <Typography variant="h5">最近の更新</Typography>
      {RecentUpdatedList(todos)}
    </Paper>  {/* 変更 */}
  )
}

実行結果です。白い背景になりました。次回でマージンを入れると背景から浮いた感じがわかるようになります。

f:id:yucatio:20181203125706p:plain

タスク一覧でPaperを使う

タスク一覧をPaperで囲みます。 今後の実装のため、ルート要素の<div>は残しておいて、その下に<Paper>コンポーネントを挿入します。

src/components/todos/index.js

import Paper from '@material-ui/core/Paper'  // 追加

class TodoComponent extends React.Component {
    // 略
    render() {
    const {isOwnTodos, match: { params: {uid}}} = this.props;
    return (
      <div>
        <Paper>  {/* 追加 */}
          <Title isOwnTodos={isOwnTodos} uid={uid} />
          {isOwnTodos && <AddTodo uid={uid} />}
          <Notice />
          <VisibleTodoList uid={uid} isOwnTodos={isOwnTodos} />
          <Footer />
        </Paper>  {/* 追加 */}
      </div>
    )
  }
}

実行結果です。こちらも白い背景になり、グレーの全体部分から浮いたようになりました。

f:id:yucatio:20181206165945p:plain

以上でコンテンツをPaperに載せることができました。

参考

★次回の記事

yucatio.hatenablog.com

★目次

yucatio.hatenablog.com

Material-UIのTypographyを使用する(STEP 4 : Material-UIの導入 - React + Redux + Firebase チュートリアル)

★前回の記事

yucatio.hatenablog.com

Material-UIのコンポーネントで囲まれていない文字列をTypographyで囲っていきます。 なお、一部はこの後のページでMaterial-UIのコンポーネントに変換するので、変換しない文字列もあります。
f:id:yucatio:20190428221446p:plain

NoMatchページ

始めにNoMatch.jsを変更します。variantにh2を指定します。

src/components/NoMatch.js({/* xxx */}のコメントは実行前に削除してください)

import Typography from '@material-ui/core/Typography'  // 追加

const NoMatch = () => (
  <Typography variant="h2">ページが見つかりません</Typography>  {/* 変更 */}
)

実行結果です。

f:id:yucatio:20181203122618p:plain

ダッシュボード画面

"最近の更新”と”データがありません”の文字列をTypographyで囲みます。

src/components/dashboard/recentUpdatedTodos/index.js

import Typography from '@material-ui/core/Typography'  // 追加

const RecentUpdatedList = (todos) => {
  // 略
  if (isEmpty(todos)) {
    return <Typography variant="body1">データがありません。</Typography>  // 変更
  }
  // 略
}

let RecentUpdatedTodos = ({todos}) => {
  return (
    <div>
      <Typography variant="h5">最近の更新</Typography>  {/* 変更 */}
      {RecentUpdatedList(todos)}
    </div>
  )
}

実行結果です。

f:id:yucatio:20181203122636p:plain

タスク一覧のコンポーネントの順番変更

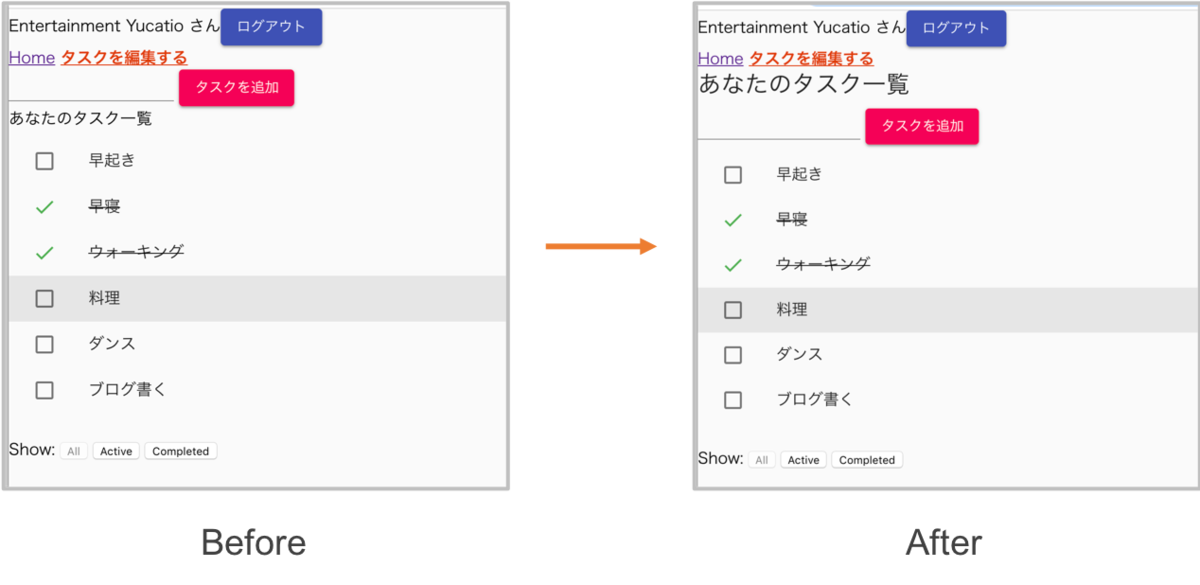
タスク一覧の文字列をTypographyに変更する前にコンポーネントの順番を変更します。

タスク追加フォーム
“{ユーザ名}のタスク一覧”
タスク一覧

という順番から

“{ユーザ名}のタスク一覧”
タスク追加フォーム
タスク一覧

という順番に変更します。

f:id:yucatio:20181203123320p:plain

ユーザ名を表示するのコンポーネントTitleという名前のコンポーネントにします。

src/components/todos/Title.js(新規作成)

import React from 'react'
import { compose } from 'redux'
import { connect } from 'react-redux'
import { firebaseConnect } from 'react-redux-firebase'
import PropTypes from 'prop-types'
        
const Title = ({displayName, isOwnTodos}) => {
  const name = isOwnTodos ? 'あなた' : `${displayName} さん`;
  return (
    <React.Fragment>
      {displayName && <div>{name}のタスク一覧</div>}
    </React.Fragment>
  )
}

Title.propTypes = {
  displayName: PropTypes.string,
  isOwnTodos: PropTypes.bool.isRequired,
}

const firebaseQueries = ({uid}) => (
  [
    {path: `users/${uid}/displayName`, type: 'once'},
  ]
)

const mapStateToProps = ({firebase: {data : {users}}}, {uid}) => ({
    displayName: users && users[uid] && users[uid].displayName,
})

export default compose(
  firebaseConnect(firebaseQueries),
  connect(
    mapStateToProps
))(Title)

src/components/todos/index.js

import Title from './Title'  // 追加

class TodoComponent extends React.Component {
  // 略
  render() {
    const {isOwnTodos, match: { params: {uid}}} = this.props;
    return (
      <div>
        <Title isOwnTodos={isOwnTodos} uid={uid} />  {/* 追加 */}
        {isOwnTodos && <AddTodo uid={uid} />}
        <Notice />
        <VisibleTodoList uid={uid} isOwnTodos={isOwnTodos} />
        <Footer />
      </div>
    )
  }
}

src/containers/todos/VisibleTodoList.js

const mapStateToProps = ({visibilityFilter, firebase: {data : {users, todos}}}, {uid}) => {  // #2
  return {
    // displayName: users && users[uid] && users[uid].displayName, を削除
    todos: getVisibleTodos(todos && todos[uid], visibilityFilter)
  }
}

const firebaseQueries = ({uid}) => (
  [
    // {path: `users/${uid}/displayName`, type: 'once'}, を削除
    `todos/${uid}`
  ]
 )

src/components/todos/TodoList.js

const TodoList = ({todos, isOwnTodos, onTodoClick}) => {  // displayNameを削除
  // 略

  //   const name = isOwnTodos ? 'あなた' : `${displayName} さん`; を削除
  return (
    {/* <div>
      {displayName && <div>{name}のタスク一覧</div>} の削除 */}
    <List>
      {Object.keys(todos).map(
        (key) => (
          <Todo
            key={key}
            isOwnTodos={isOwnTodos}
            {...todos[key]}
            onClick={isOwnTodos ? (() => onTodoClick(key)) : (() => {})} />
        )
      )}
    </List>
    {/* </div> の削除 */}
  )
}

TodoList.propTypes = {
  // displayName: PropTypes.string,  は削除
  isOwnTodos: PropTypes.bool.isRequired,
  // 略
}

以上でユーザ名の表示をタスク追加フォームの上に移動することができました。

タスク一覧画面

"{ユーザ名}のタスク一覧"と"タスクがありません"の文字列をTypographyで囲みます。"{ユーザ名}のタスク一覧"の方は、gutterBottomを指定して、下に余白を設定しています。

src/components/todos/Title.js({/* xxx */}のコメントは実行前に削除してください)

import Typography from '@material-ui/core/Typography'  // 追加

const Title = ({displayName, isOwnTodos}) => {
  const name = isOwnTodos ? 'あなた' : `${displayName} さん`;
  return (
    <React.Fragment>
      {displayName && <Typography variant="h5" gutterBottom>{name}のタスク一覧</Typography>}  {/* 変更 */}
    </React.Fragment>
  )
}

src/components/todos/TodoList.js

import Typography from '@material-ui/core/Typography'  // 追加

const TodoList = ({todos, isOwnTodos, onTodoClick}) => {
  // 略
  if (isEmpty(todos)) {
    return <Typography variant="body1">タスクがありません。</Typography>  // 変更
  }
  // 略
}

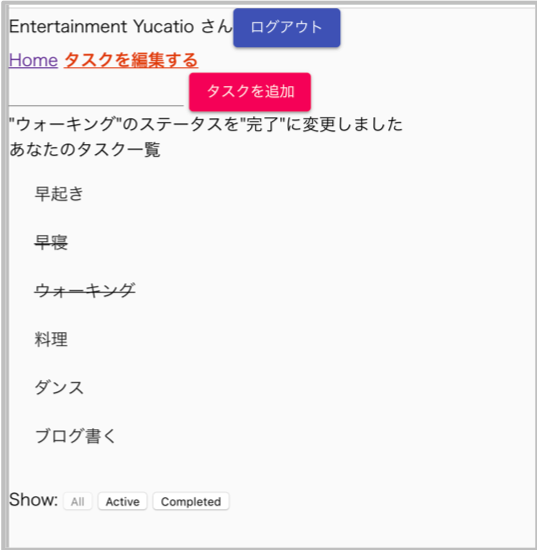
実行結果です。

f:id:yucatio:20181206165612p:plain

f:id:yucatio:20181203123256p:plain

以上で通常のテキストをTypographyに変更できました。

参考

★次回の記事

yucatio.hatenablog.com

★目次

yucatio.hatenablog.com

Material-UIのCircularProgressを使用する(STEP 4 : Material-UIの導入 - React + Redux + Firebase チュートリアル)

★前回の記事

yucatio.hatenablog.com

データの読み込み中、"読み込み中"という文言での表示から、CircularProgressへ変更します。CircularProgressは読み込み中を示すぐるぐるです。

"最近の更新"の読み込み表示の変更

src/components/dashboard/recentUpdatedTodos/index.js

import CircularProgress from '@material-ui/core/CircularProgress'  // 追加

const RecentUpdatedList = (todos) => {
  if (!isLoaded(todos)) {
    return <CircularProgress />  // 変更
  }
  // 略
}

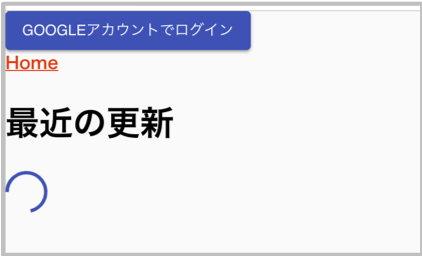
実行結果です。青色(primary色)で読み込み中を表す円がぐるぐる回ります。

f:id:yucatio:20181201224146p:plain

タスク一覧の読み込み表示の変更

src/components/todos/TodoList.js

import CircularProgress from '@material-ui/core/CircularProgress'  // 追加

const TodoList = ({displayName, todos, isOwnTodos, onTodoClick}) => {
  if (!isLoaded(todos)) {
    return <CircularProgress />  // 変更
  }
  // 略
}

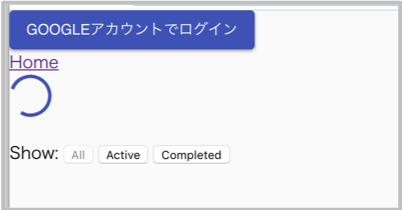
実行結果です。こちらも青色(primary色)で読み込み中を表す円がぐるぐる回ります。

f:id:yucatio:20181201224745p:plain

ログイン中表示の変更

ログイン中の表示は後々のためにinherit(親コンポーネントから継承)にします。

src/components/login/index.js

import CircularProgress from '@material-ui/core/CircularProgress'  // 追加

let Login = ({ auth, loginWithGoogle, logout }) => {
  if (!isLoaded(auth)) {
    return <CircularProgress color="inherit" />  // 変更
  }
  // 略
}

実行結果です。

f:id:yucatio:20181201224313p:plain

以上で読み込み中の時にCircularProgressを表示することができました。

参考

★次回の記事

yucatio.hatenablog.com

★目次

yucatio.hatenablog.com

Material-UIのListを使用する(タスク一覧編)(STEP 4 : Material-UIの導入 - React + Redux + Firebase チュートリアル)

★前回の記事

yucatio.hatenablog.com

前回に引き続き、<ul><List>に、<li><ListItem>に変更します。 今回はタスク一覧です。

f:id:yucatio:20190428183941p:plain

タスク一覧でMaterial-UIのListを使用する

<ul><List>に変更します。また、後で必要になるので、isOwnTodosをpropsとしてTodoコンポーネントに渡します。

src/components/todos/TodoList.js({/* xxx */}のコメントは実行前に削除してください)

import List from '@material-ui/core/List' // 追加

const TodoList = ({displayName, todos, isOwnTodos, onTodoClick}) => {
  // 中略

  return (
    <div>
      {displayName && <div>{name}のタスク一覧</div>}
      <List>  {/* 変更 */}
        {Object.keys(todos).map(
          (key) => (
            <Todo
              key={key}
              isOwnTodos={isOwnTodos}  // 追加
              {...todos[key]}
              onClick={isOwnTodos ? (() => onTodoClick(key)) : (() => {})} />
          )
        )}
      </List>  {/* 変更 */}
    </div>
  )
}

続いて<li><ListItem>に変更します。 <ListItem>内のテキストは<ListItemText>で囲みます。

src/components/todos/Todo.js({/* xxx */}のコメントは実行前に削除してください)

import ListItem from '@material-ui/core/ListItem'  // 追加
import ListItemText from '@material-ui/core/ListItemText'  // 追加

const Todo = ({onClick, completed, text}) => (
  <ListItem  // 変更
    onClick={onClick}
    {/* styleは下のspanに移動 */}
  >
    <ListItemText>  {/* 追加 */}
      <span style={ {textDecoration: completed ? 'line-through' : 'none'}}>{text}</span>  {/* spanで囲む*/}
    </ListItemText>  {/* 追加 */}
 </ListItem>  {/* 変更 */}
)

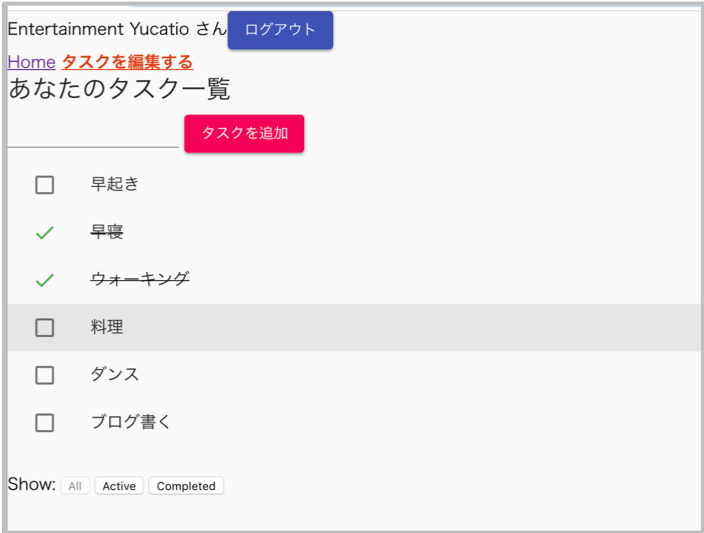
実行結果です。Material-UIのListに変更できました。タスクの完了フラグの更新も正常に動作します。

f:id:yucatio:20181201160055p:plain

自身のタスクのみボタンUIにする

自分自身のタスクを表示している時のみクリックで完了フラグを切り替えられるので、その時のみ表示をbuttonにします。

src/components/todos/Todo.js({/* xxx */}のコメントは実行前に削除してください)

const Todo = ({isOwnTodos, onClick, completed, text}) => ( // isOwnTodosを追加
  <ListItem  
    button={isOwnTodos}  // 追加
    onClick={onClick}
  >
    {/* 中略 */}
 </ListItem>
)

Todo.propTypes = {
  isOwnTodos: PropTypes.bool.isRequired,  // 追加
  // 略
}

実行結果です。

自身のタスクの場合↓マウスオーバーで選択した項目の背景色が変わります。

f:id:yucatio:20181201160112p:plain

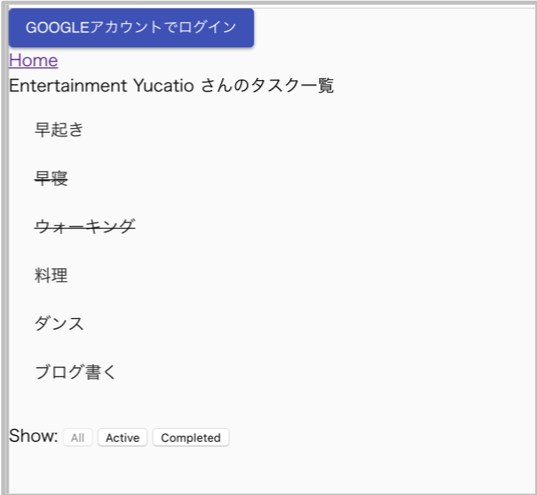
ログアウト時または他のユーザのタスクの場合↓マウスオーバーしても色は変わりません。

f:id:yucatio:20181201160127p:plain

完了マークと未完了マークの表示

完了か未完了かをアイコンでも表示します。

  • 完了の場合は緑色のチェックマークを表示します。
  • 未完了の場合は、自身のタスクの場合のみ中抜きの四角(□)を表示する。このことによって、自分のタスクは”押せそう”な感じにします。
  • ListItemTextの位置をそろえるためにinset属性を追加します。

src/components/todos/Todo.js({/* xxx */}のコメントは実行前に削除してください)

import ListItemIcon from '@material-ui/core/ListItemIcon'  // 追加
import green from '@material-ui/core/colors/green'  // 追加
import Done from '@material-ui/icons/Done'  // 追加
import CheckBoxOutlineBlank from '@material-ui/icons/CheckBoxOutlineBlank'  // 追加

// CheckIcon関数コンポーネントを追加
const CheckIcon = (isOwnTodos, completed) => {
  // 完了の場合
  if (completed) {
    return (
      <ListItemIcon>
        <Done nativeColor={green[500]} />
      </ListItemIcon>
    )
  }
  // 未完了の場合
  // 自身のタスクの場合
  if (isOwnTodos) {
    return (
      <ListItemIcon>
        <CheckBoxOutlineBlank />
      </ListItemIcon>
    )
  }
  return null
}

const Todo = ({isOwnTodos, onClick, completed, text}) => (
  <ListItem
    button={isOwnTodos}
    onClick={onClick}
  >
    {CheckIcon(isOwnTodos, completed)}  {/* 追加 */}
    <ListItemText inset>  {/* insetを追加 */}
      <span style={ {textDecoration: completed ? 'line-through' : 'none'}}>{text}</span>
    </ListItemText>
 </ListItem>
)

自身のタスクの場合↓

f:id:yucatio:20181201160142p:plain

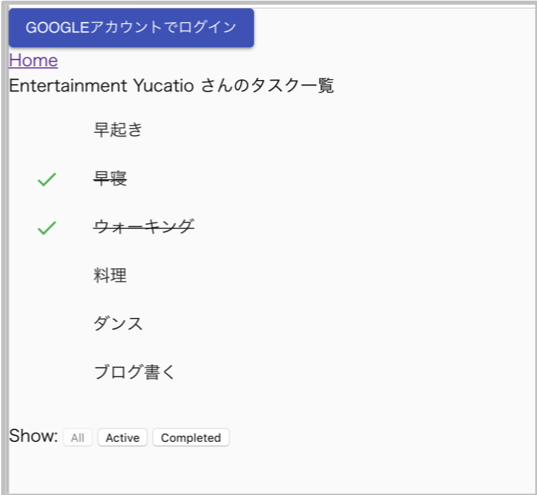
ログアウト時または他のユーザのタスクの場合↓

f:id:yucatio:20181201160155p:plain

以上でタスク一覧をMaterial-UIのListに変更できました。

参考

★次回の記事

yucatio.hatenablog.com

★目次

yucatio.hatenablog.com

Material-UIのListを使用する(最近の更新編)(STEP 4 : Material-UIの導入 - React + Redux + Firebase チュートリアル)

★前回の記事

yucatio.hatenablog.com

Material-UIのListを導入します。 <ul><List>に、<li><ListItem>に変更します。

最近の更新リストでMaterial-UIのListを使用する

<ul><List>に変更します。

src/components/dashboard/recentUpdatedTodos/index.js

import List from '@material-ui/core/List'  // 追加

let RecentUpdatedTodos = ({todos}) => {
  // 中略

  return (
    <div>
      {header}
      <List>  {/* 変更 */}
        {todos.map(({key, value:todo}) =>
          <UserUpdatedTodos key={key} {...todo}/>
        )}
      </List>  {/* 変更 */}
    </div>
  )
}

続いて<li><ListItem>に変更します。 <ListItem>内のテキストは<ListItemText>で囲みます。

src/components/dashboard/recentUpdatedTodos/UserUpdatedTodo.js({/* xxx */}のコメントは実行前に削除してください)

import ListItem from '@material-ui/core/ListItem'  // 追加
import ListItemText from '@material-ui/core/ListItemText'  // 追加

const UserUpdatedTodo = ({text, eventType, uid, displayName, _updatedAt}) => (
  <ListItem>  {/* 変更 */}
    <ListItemText>  {/* 追加 */}
      <Link to={`/users/${uid}/todos`}>{displayName}</Link>さんが {text}{ eventType === 'CREATE' ? '作成' : '更新'}
      しました。 ({ moment(_updatedAt).fromNow()})
    </ListItemText>  {/* 追加 */}
  </ListItem>  {/* 変更 */}
)

実行結果です。

f:id:yucatio:20181130133919p:plain

Material-UIのListに変更ができました。

見た目の調整

さらに変更していきます。

divider(境界線)を入れる

リストの各項目の間に線を入れます。

src/components/dashboard/recentUpdatedTodos/UserUpdatedTodo.js

const UserUpdatedTodo = ({text, eventType, uid, displayName, _updatedAt}) => (
  <ListItem divider>   {/* dividerを追加 */}
    <ListItemText>
      {/* 略 */}
    </ListItemText>
  </ListItem>
)

実行結果です。項目間にグレーの線が入りました。

f:id:yucatio:20181130134113p:plain

secondaryテキスト

更新時間(○時間前の表示)をsecondaryテキストとして表示します。

src/components/dashboard/recentUpdatedTodos/UserUpdatedTodo.js

const UserUpdatedTodos = ({text, eventType, uid, displayName, avatarUrl, _updatedAt}) => (
  <ListItem divider>
    <ListItemText
      secondary={moment(_updatedAt).fromNow()}>  {/* secondaryを追加 */}
      <Link to={`/users/${uid}/todos`}>{displayName}</Link>さんが {text}{ eventType === 'CREATE' ? '作成' : '更新'}
      しました。     {/* 更新時間を削除 */}
    </ListItemText>
  </ListItem>
)

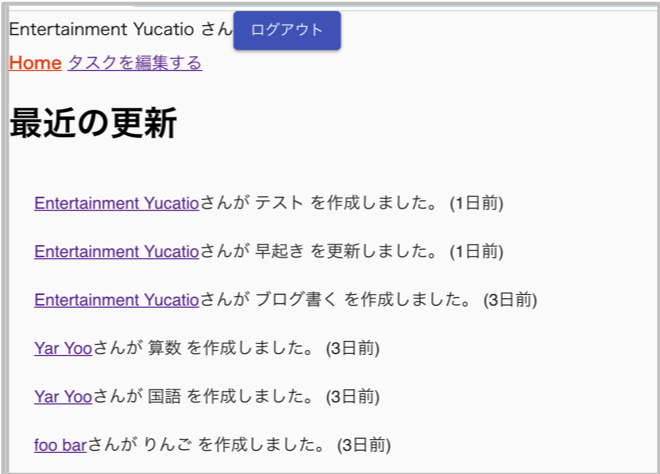
実行結果です。更新時間が2行目に表示され、文字色が薄くなりました。

f:id:yucatio:20181130134308p:plain

項目を選択した時にリンク先に飛ぶように変更

現在の実装では、ユーザ名をクリックした時にリンク先に飛ぶようにしていますが、リストの項目が選択された時にリンク先に飛ぶように変更します。

ListItembutton属性を使用することで各項目がボタンになり、マウスオーバーした時に色が変わります。

react-routerのLinkListItemを同時に使うには、ListItemcomponent属性にLinkコンポーネントを渡します。

src/components/dashboard/recentUpdatedTodos/UserUpdatedTodo.js

const UserUpdatedTodos = ({text, eventType, uid, displayName, avatarUrl, _updatedAt}) => (
  <ListItem divider button component={Link} to={`/users/${uid}/todos`}>  {/* 変更 */}
    <ListItemText
      secondary={moment(_updatedAt).fromNow()} >
      {displayName}さんが {text}{eventType === 'CREATE' ? '作成' : '更新'}しました。  {/* Linkタグを削除 */}
    </ListItemText>
  </ListItem>
)

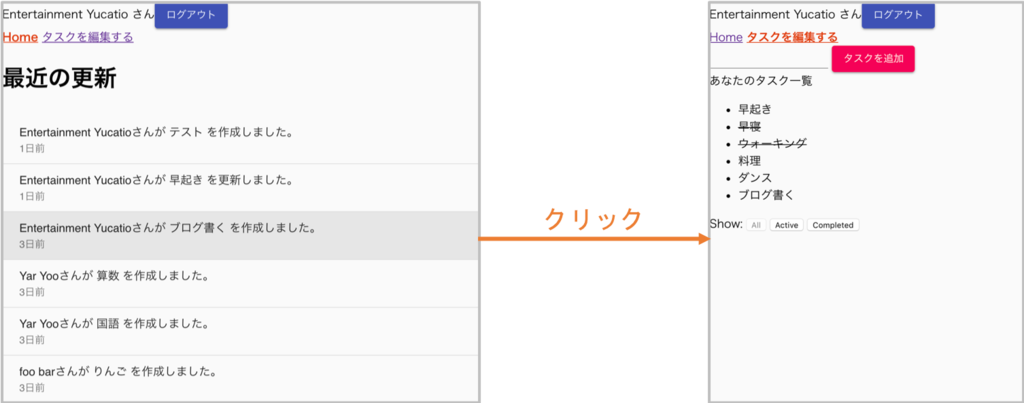
実行結果です。マウスオーバー時に色が変わります。クリックするとリンク先に飛びます。

f:id:yucatio:20181130134812p:plain

以上で最近の更新リストをMaterial-UIのListに変更できました。

参考

★次回の記事

yucatio.hatenablog.com

★目次

yucatio.hatenablog.com

Material-UIのTextFieldを使用する(STEP 4 : Material-UIの導入 - React + Redux + Firebase チュートリアル)

★前回の記事

yucatio.hatenablog.com

続いて、<input><TextField>に変更します。

f:id:yucatio:20190428182120p:plain

inputのref

<input>ref属性を使用している場合は、<TextField>に変更する際にいくつか注意点があります。

  • ref属性をinputRef属性に変更する
  • <input>への参照を保存する変数はクラス変数にする

上記の変更も同時に行う必要があります。また、クラス変数を使用するため、関数コンポーネントから、React.Componentを拡張したクラスへの変更を行います。

Material-UIのTextFieldを使用する

ソースコードを書き換えていきます。

src/containers/todos/AddTodo.js({/* xxx */}のコメントは実行前に削除してください)

import TextField from '@material-ui/core/TextField'  // #1

class AddTodo extends React.Component {  // #2
  render() {  // #3
    const {uid, dispatch} = this.props  // #4

    // let input は削除  // #5

    return (
      <div>
        <form
          onSubmit={ e => {
            e.preventDefault()
            if (!this.inputElement.value.trim()) {  // #6
              return
            }
            dispatch(addTodo(uid, this.inputElement.value))  // #7
            this.inputElement.value = ''  // #8
          }}
        >
          <TextField  // #9
            inputRef={node => {  // #10
              this.inputElement = node  // #11
            }}
          />
          {' '}  {/* #12 */}
          <Button variant="contained" color="secondary" type="submit">
            タスクを追加
          </Button>
        </form>
      </div>
    )
  }
}
  • TextFieldをmaterial-uiからインポートします(#1)。
  • AddTodoコンポーネントを関数コンポーネントからReact.Componentを拡張したクラスに変更します(#2)。
  • クラスに変更したので、renderメソッドを定義し、propsの受け取りかたを変更します(#3, #4)。
  • ローカル変数inputは使用しないので、削除します(#5)。
  • input.valuethis.inputElement.valueに変更します(#6, #7, #8)。
  • <input><TextField>に変更します(#9)。
  • ref属性をinputRef属性に変更します(#10)。TextField内で描画される<input>refに、inputRefで指定した内容が渡されます。
  • 参照の保存先を、ローカル変数からメンバ変数に変更します(#11)。ローカル変数に保存すると、AddTodoのコンポーネントが再描画される際に、ローカル変数inputundefinedで再度初期化される一方、inputRefに指定した関数は実行されず、<input>の内容が取得できないためです。詳しくは参考のリンク先をご覧ください。
  • <TextField><Button>の間に空白を入れます(#12)。見た目の調整です。

実行結果

書き換えた結果は以下のようになります。

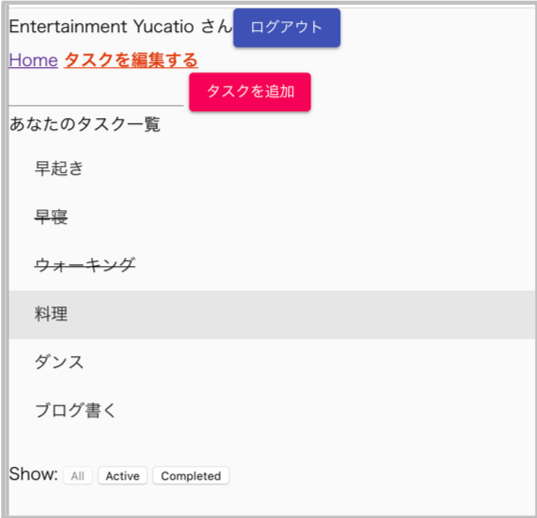
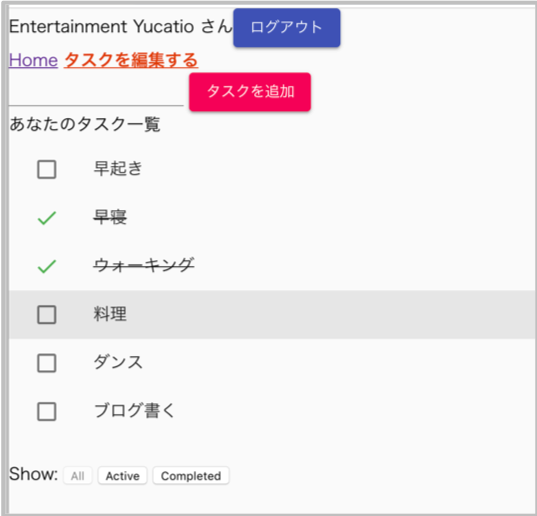
f:id:yucatio:20181129230044p:plain

タスクの入力部分がMaterial-UIのものになりました。デフォルトではテキストの入力フォームは下線のみ描画されます。

タスクの追加も正常に行えます。

以上でMaterial-UIのTextFieldへの変更が完了しました。

参考

★次回の記事

yucatio.hatenablog.com

★目次

yucatio.hatenablog.com

Material-UIのButtonを使用する(STEP 4 : Material-UIの導入 - React + Redux + Firebase チュートリアル)

★前回の記事

yucatio.hatenablog.com
既存のコンポーネントをReactのコンポーネントに置き換えていきます。 まずは<button><Button>に置き換えます。 なお、一部ボタンはこの後のページでMaterial-UIのコンポーネントに変換するので、変換しないものもあります。

f:id:yucatio:20190428183640p:plain

Material-UIのButtonを使用する

<button><Button>に置き換えます。ログイン/ログアウトボタンを変更します。

src/components/login/index.js({/* xxx */}のコメントは実行前に削除してください)

import Button from '@material-ui/core/Button' // #1

let Login = ({ auth, loginWithGoogle, logout }) => {
  // 中略

  if (isEmpty(auth)) {
    return (
      <Button onClick={loginWithGoogle}>Googleアカウントでログイン</Button> {/* #2 */}
    )
  }

  return (
    <div>
      {auth.displayName} さん
      <Button onClick={logout}>ログアウト</Button> {/* #3 */}
    </div>
  );
}
  • Buttonをmaterial-iuからimportします(#1)。
  • <button><Button>に置き換えます(#2, #3)。

実行結果です。

f:id:yucatio:20181129223742p:plain

ボタンの輪郭がなくなり、テキストのみの外観になりました。マウスカーソルを重ねるとボタンの輪郭が現れます。

もう少しボタンっぽくしたいので、variant="contained”でボタンを塗りつぶすようにし、色をメインカラー(color="primary”)にします。

src/components/login/index.js

import Button from '@material-ui/core/Button';

let Login = ({ auth, loginWithGoogle, logout }) => {
  // 中略

  if (isEmpty(auth)) {
    return (
      <Button variant="contained" color="primary" onClick={loginWithGoogle}>Googleアカウントでログイン</Button>  {/* 変更 */}
    )
  }

  return (
    <div>
      {auth.displayName} さん
      <Button variant="contained" color="primary" onClick={logout}>ログアウト</Button>  {/* 変更 */}
    </div>
  );
}

ログインボタン↓

f:id:yucatio:20181129224045p:plain

ログアウトボタン↓

f:id:yucatio:20181129224108p:plain

中身が塗りつぶされたボタンになりました。

AddTodoも変更します。色は、アクセントカラーであるsecondaryにします。

src/containers/todos/AddTodo.js

import Button from '@material-ui/core/Button'  {/* 追加 */}

let AddTodo = ({ uid, dispatch }) => {
  let input

  return (
    // 中略
        <Button variant="contained" color="secondary" type="submit">  {/* 変更 */}
          タスクを追加  {/* 日本語に変更 */}
        </Button>  {/* 変更 */}
    // 中略
  )
}

実行結果です。

f:id:yucatio:20181129224327p:plain

ピンク色のボタンになりました。

以上でMaterial-UIのButtonへの変更ができました。

参考

★次回の記事

yucatio.hatenablog.com
★目次

yucatio.hatenablog.com