date-fnsを使用してカレンダー作成する(その3: Material-UIのコンポーネントを使用して見た目を整える)
前回までで基本的なカレンダーの機能を作成することができました。今回は見た目を整えて行きましょう。Material-UIを利用します。
★前回の記事
今回の変更点
- 余白を作成する
- Material-UIのボタンを使用する
- ボタンを左端、中央、右端に配置する
- 年月の表示に見出しを適用する
- Material-UIのテーブルを使用する

デモ : date-fns calendar
なお、ブログ主はデザインセンスがないので、その辺はご容赦ください。
ライブラリのインストール
Material-UIのパッケージをインストールします。
yarn add @material-ui/core
コーディング
順にコードを追加していきましょう。
Paperと余白の追加
はじめに、CssBaselineを追加し、背景色をつけます。
Paperの上にテーブルを載せましょう。Paperには余白を設定します。
import React, { useState }  from 'react'
// 中略
import { makeStyles } from '@material-ui/core/styles'  // 追加
import CssBaseline from '@material-ui/core/CssBaseline'  // 追加
import Paper from '@material-ui/core/Paper'  // 追加

// 追加ここから
const useStyles = makeStyles(theme => ({
  paper: {
    margin: theme.spacing(5, 10),
    padding: theme.spacing(5, 5),
  },
}));
// 追加ここまで

// 中略

function App() {
  const [targetDate, setTargetDate] = useState(new Date())
  const classes = useStyles() // 追加
  const calendar = getCalendarArray(targetDate)

  return (
    <div>
      <CssBaseline />  {/* 追加 */}
      <Paper className={classes.paper}>  {/* 追加 */}
        <div>
          <button onClick={() => setTargetDate(subMonths(targetDate, 1))}>前の月</button>
          <button onClick={() => setTargetDate(new Date())}>今月</button>
          <button onClick={() => setTargetDate(addMonths(targetDate, 1))}>次の月</button>
        </div>

        {format(targetDate, 'y年M月')}
        <table>
          {/* 中略 */}
        </table>
      </Paper>  {/* 追加 */}
    </div>
  )
}

export default App
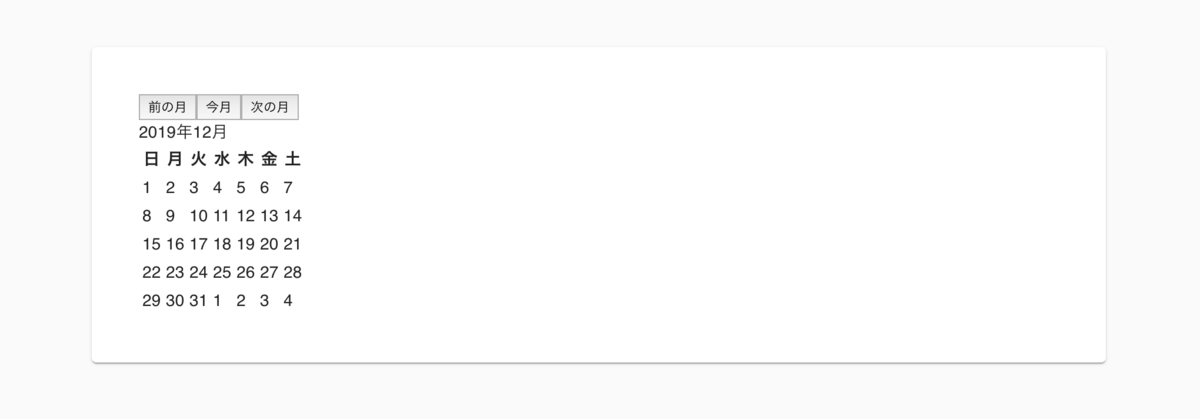
実行結果です。カレンダーがPaperコンポーネントの上に載り、余白が追加されました。

ボタンのスタイルを整える
次に、ボタンをMaterial-UIのButtonコンポーネントに置き換えます。 ボタンをそれぞれ親コンポーネントの左端、中央、右端に配置するため、Gridコンポーネントを利用します。
Grid containerにjustify="space-between"を指定することで、ボタンが右端左端と中央に置かれます。
import React, { useState }  from 'react'
// 中略
import Button from '@material-ui/core/Button' // 追加
import Grid from '@material-ui/core/Grid' // 追加

// 中略

function App() {
  const [targetDate, setTargetDate] = useState(new Date())
  const classes = useStyles()
  const calendar = getCalendarArray(targetDate)

  return (
    <div>
      <CssBaseline />
      <Paper className={classes.paper}>
        {/* 変更ここから */}
        <Grid container justify="space-between">
          <Grid item>
            <Button variant="outlined" onClick={() => setTargetDate(subMonths(targetDate, 1))}>前の月</Button>
          </Grid>
          <Grid item>
            <Button variant="outlined" onClick={() => setTargetDate(new Date())}>今月</Button>
          </Grid>
          <Grid item>
            <Button variant="outlined" onClick={() => setTargetDate(addMonths(targetDate, 1))}>次の月</Button>
          </Grid>
        </Grid>
        {/* 変更ここまで */}

        {format(targetDate, 'y年M月')}
        <table>
            {/* 中略 */}
        </table>
      </Paper>
    </div>
  )
}

export default App
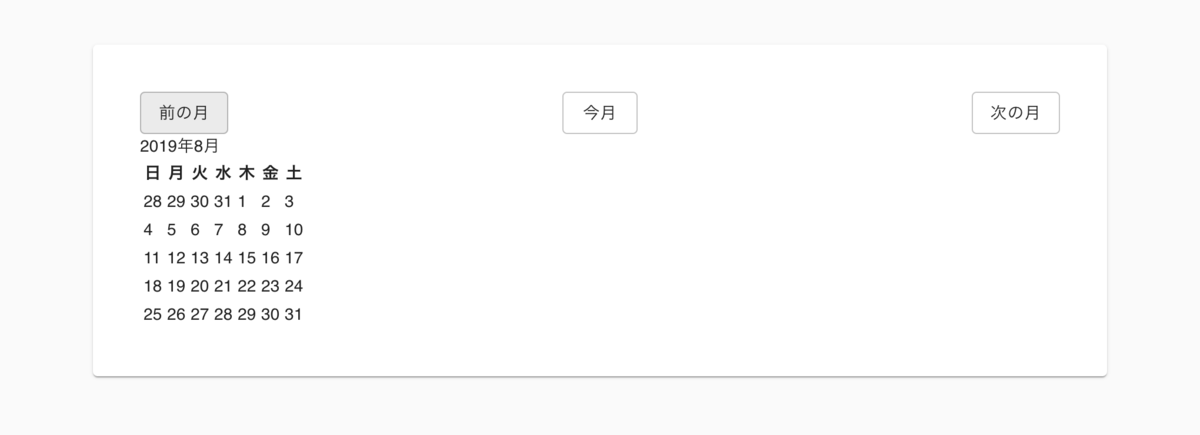
実行結果です。Material-UIのボタンに変更されました。右端左端、中央にボタンが配置されています。

年月の表示に見出しを適用する
"2019年12月"などと表示されている部分にスタイルを適用しましょう。
Typographyを使用します。そのままだと上下が窮屈な感じがしたので、少し空白を設けました。
import React, { useState }  from 'react'
// 中略
import Typography from '@material-ui/core/Typography'  // 追加

const useStyles = makeStyles(theme => ({
  paper: {
    margin: theme.spacing(5, 10),
    padding: theme.spacing(5, 5),
  },
  // 追加ここから
  yearmonth: {
    margin: theme.spacing(2, 0, 1, 0),
  },
  // 追加ここまで
}));

// 中略

function App() {
  const [targetDate, setTargetDate] = useState(new Date())
  const classes = useStyles()
  const calendar = getCalendarArray(targetDate)

  return (
    <div>
      <CssBaseline />
      <Paper className={classes.paper}>
        <Grid container justify="space-between">
          {/* 中略 */}
        </Grid>

        {/* 変更ここから */}
        <Typography variant="h4" align="center" className={classes.yearmonth}>{format(targetDate, 'y年M月')}</Typography>
        {/* 変更ここまで */}
        <table>
          {/* 中略 */}
        </table>
      </Paper>
    </div>
  )
}

export default App
実行結果です。文字が大きくなり、中央に表示されました。

テーブルのスタイルを整える
htmlタグ(正確にいうと組み込みのコンポーネント)とMaterial-UIのコンポーネントの変換表です。 この表に従ってコードを書き直します。
| htmlタグ | Material-UI コンポーネント |
|---|---|
| table | Table |
| thead | TableHead |
| tbody | TableBody |
| tr | TableRow |
| th, td | TableCell |
テーブルのヘッダの文字色と背景色も変更しました。文字をセルの左右中央に配置されるように指定しました。
import React, { useState }  from 'react'
// 中略
// 追加ここから
import Table from '@material-ui/core/Table';
import TableBody from '@material-ui/core/TableBody'
import TableCell from '@material-ui/core/TableCell'
import TableHead from '@material-ui/core/TableHead'
import TableRow from '@material-ui/core/TableRow'
// 追加ここまで

const useStyles = makeStyles(theme => ({
  paper: {
    margin: theme.spacing(5, 10),
    padding: theme.spacing(5, 5),
  },
  yearmonth: {
    margin: theme.spacing(2, 0, 1, 0),
  },
  // 追加ここから
  tableHead: {
    color: theme.palette.secondary.contrastText,
    backgroundColor: theme.palette.secondary.light,
  },
  // 追加ここまで
}));

// 中略

function App() {
  const [targetDate, setTargetDate] = useState(new Date())
  const classes = useStyles()
  const calendar = getCalendarArray(targetDate)

  return (
    <div>
      <CssBaseline />
      <Paper className={classes.paper}>
        <Grid container justify="space-between">
          {/* 中略 */}
        </Grid>

        <Typography variant="h4" align="center" className={classes.yearmonth}>{format(targetDate, 'y年M月')}</Typography>
        {/* 変更ここから */}
        <Table>
          <TableHead>
            <TableRow>
              <TableCell align="center" classes={{head: classes.tableHead, }}>日</TableCell>
              <TableCell align="center" classes={{head: classes.tableHead, }}>月</TableCell>
              <TableCell align="center" classes={{head: classes.tableHead, }}>火</TableCell>
              <TableCell align="center" classes={{head: classes.tableHead, }}>水</TableCell>
              <TableCell align="center" classes={{head: classes.tableHead, }}>木</TableCell>
              <TableCell align="center" classes={{head: classes.tableHead, }}>金</TableCell>
              <TableCell align="center" classes={{head: classes.tableHead, }}>土</TableCell>
            </TableRow>
          </TableHead>
          <TableBody>
            {calendar.map((weekRow, rowNum) => (
              <TableRow key={rowNum}>
                {weekRow.map(date => (
                  <TableCell key={getDay(date)} align="center">{getDate(date)}</TableCell>
                ))}
              </TableRow>
            ))}
          </TableBody>
        </Table>
        {/* 変更ここまで */}
      </Paper>
    </div>
  )
}

export default App
実行結果です。Material-UIのテーブルが使用されました。

以上でMaterial-UIのコンポーネントへの置き換えが完了しました。
ソースコード
ここまでのソースコードです。
GitHub - yucatio/date-fns-calendar at 3c6585622b48bb92b7ed9f71c2ecc8cab3f31b8e
環境
- npm: 6.12.1
- react: 16.12.0
- date-fns: 2.8.1
- Material-UI: 4.8.0
次回の記事
次回は日付の色を調整します。